False lashes are a great way to enhance every woman's gaze. However, not all of us have the time to spend a few hours at a beauty salon. The lash extension treatment is also associated with a considerable expense. Fortunately, there are equally impressive and cheaper lash extension methods that you can perform without leaving home easily.
Which false eyelashes to choose?
We distinguish three at-home eyelash extensions methods:
- strip lashes,
- magnetic eyelashes,
- DIY cluster lashes
Each of them is characterized by a completely different application method. Get to know them better and decide for yourself what will work for you best. Remember that it's not just the results that count but the whole styling process which should be easy, fast, and safe.
DIY cluster lashes
False cluster lashes for at-home lash extensions are the safest and most durable method among those mentioned above. What are their main advantages?
- cluster lashes are set on flexible black strips that are imperceptible when worn,
- the eyelash clusters are applied underneath the natural lashes which are previously coated with a special bonder so the styling looks very natural and the joints are invisible,
- products used for DIY eyelash extensions do not come into contact with the delicate eyelid skin,
- applying cluster eyelashes takes less than 10 minutes and lasts about 5 days,
- you can take them off at any time with the help of a remover,
- the choice of styles is very wide and everyone can find something for themselves.
What will you need to apply DIY cluster lashes?
To apply cluster lashes at home, you will need more than the usual drugstore glue and tweezers. Before you choose this method, it's helpful to know what products and tools you'll need to create a beautiful and long-lasting look:
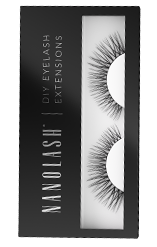
- Eyelash clusters for DIY application at home, enclosed in a decent case that protects them from damage.
- A bonder - a special glue for do-it-yourself lash extensions. Its formula is tacky and does not dry out like ordinary eyelash glue. This gives you full control over the finished look.
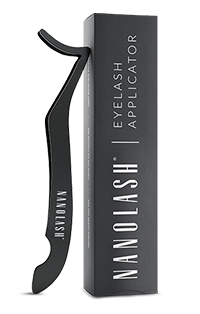
- To make the application easier and more effective, a specially shaped false lash applicator comes in handy, which fuzes cluster lashes with natural ones easily.
- A sealer - a fixer for DIY lash extensions. Apply it to the lashes following application to neutralize the tackiness of the bonder and fix the styling.
- A false lash remover that allows you to remove the clusters at any time safely and gently. It is applied preferably underneath the lashes and after a while, the clusters gently slide off our eyelids.
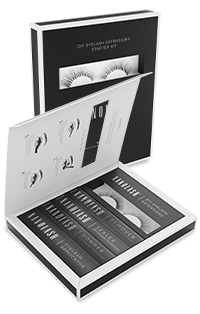
Manufacturers of DIY eyelash clusters offer the above-mentioned products and special applicators in their stores. They also come in starter kits, containing all the necessary accessories including the selected style of eyelashes. The price of such kits is quite attractive and the products included in it last for many applications.
How to apply DIY cluster lashes?
Applying false lash clusters for DIY application at home is intuitive and convenient. With these simple instructions, you'll gain confidence that your look will be durable and last up to 5 days!
STEP 1: Clean your eyelashes well. You can use a special lash and brow shampoo which will prep them for the application perfectly.
STEP 2: Apply your DIY eyelash clusters with a bonder. Apply it to the entire length of your lashes or from the root to halfway down (it's best to adjust the way you apply the bonder to the length of your natural lashes) and wait 15-20 seconds. The bonder doesn't lose its tackiness and doesn't dry out, so you can easily apply more clusters if you feel like it.
STEP 3: Grab the cluster at the base (never grab the tips as you may damage the delicate cluster) and, looking down or slightly stretching the eyelid upward, apply the lashes underneath your natural ones. Keep a distance of 1 mm from the lash line. If the cluster is attached properly, move on to the next one.
STEP 4: Each time you apply a lash cluster and feel like you're happy with it, use the special applicator to press the lashes together. This fixes the styling and fuses the false and natural lashes together. Once all the lashes are applied, press them once more with the applicator.
STEP 5: Once the application is complete, it's time to neutralize the tackiness of the bonder. Use a sealer for this task. The product has a special brush, which lets you apply the product to the areas where you previously applied the bonder. And you're done!
If you want to remove the lashes, just use the false lash remover. After applying it to your lashes, wait about 30 seconds and gently slide the clusters off. Then remove your makeup as usual.
Strip lashes
As the name suggests, strip eyelashes come on a long black strip that we stick to our eyelids. We can find many different styles of strip eyelashes which can be easily matched to the occasion.
How to apply strip lashes?
Before you start applying this type of eyelashes, try them on to your eye first. The strips are supposed to be relatively universal, so you may find they are too long for your eyes. Then they need to be trimmed. Be careful not to cut off too much as the results may not be the best. The steps in applying strip eyelashes are very simple:
- Clean your eyelids of any skincare residues.
- Apply a small amount of dedicated glue to the lash strip.
- Glue the strip to your eyelid just above the lash line.
You may encounter some problems while applying the strip lash. The strip may stick too high or too low and it can move across the eyelid, staining it with glue. Also, when trying to apply the strip lashes properly near one corner of the eye, the glue on the other end of the strip may have already dried, making the lashes not stick to the skin well. Remember to take off your strip lashes before going to bed.
Magnetic lashes
A significant difference with magnetic eyelashes is the lack of lash glue. You'll need a special eyeliner with iron particles to attach the strip to the eyelid. The lash strip is equipped with small magnets designed to draw the eyeliner.
How to apply magnetic lashes?
Applying false magnetic lashes is very simple and also requires three easy steps:
- A special eyeliner with iron particles is applied first, you can also apply it on top of your eye makeup so it is not required to cleanse the skin thoroughly beforehand.
- With the help of the dedicated eyeliner, draw a line on the eye. It's up to you whether the line will go from one corner of the eye to the other, or maybe you want to bet on something more expressive.
- Wait for the eyeliner to dry and bring the magnetic lashes closer to it. The eyeliner should easily attract the magnets. If the eyelashes cling to the eyelid in a crooked way, you can easily peel them off and try again.
A question arises - are magnetic lashes for everyone? To make sure the eyelashes stick to the eyelid, you need to use the right amount of eyeliner. A thin line may not be enough and not all women are fans of a thick and long line. The eyeliner does not always fit the eye shape, so it may completely fail in case of owners of droopy eyelids. According to the opinions of many users, the smell of the eyeliner is not very pleasing and its applicator lacks precision.
Summary - which eyelashes to choose for do-it-yourself lash extensions at home?
It seems like cluster lashes for DIY lash extensions at home are the best choice. They are very easy to apply, have an incredibly wide choice of styles, and manufacturers ensure that anyone can cope with their application. In addition, they are affordable which translates into the durability of the application and efficiency. Investing in an eyelash extension kit allows you to apply the lashes multiple times and the products in it are safe for the eyes.